Friday, November 20, 2015

Which buttonhole attachment fits my vintage sewing machine?


You've seen those cool "Jetson's" style button hole attachments, in the awesome atomic era case.  But does it fit your sewing machine?

First we will talk about Singers, then broaden the field a bit!  The earliest Singer buttonholer didn't come with templates, it came with wing nuts and was adjustable in different directions.  This blog has pictures of the different button hole attachments. Then came the buttonholers with metal templates,
this is also when Singer began color coding the cases, burgundy for the slant shank, green for the straight (vertical) needle machines.  They followed it along with the 1960s buttonholer, the pink is for slant shanks, and the turquoise is for straight.  I know, you have a straight needle machine but like the pink??  Me too.  But then I got a slant shank machine so now I have an excuse to have the pink.

But often when folks are selling sewing stuff they don't know anything about it.  If it looks like a sewing thing it gets stuck in a drawer or in a bag at a thrift store - there is no guarantee that it is in the right box, or that even if it came with your machine that it goes with that machine.

For the earlier Singer ones the part number is on the bottom, so you can match it up, with a source like the blog I linked above.  But the ones in the cool Jetsons case don't have the Singer part number on them!  And the instruction book is for both models.  But I found out something cool the other day, look at the top of the metal part that attaches to your needlebar:


It says Straight or Slant! So you can be sure you get the one to match your machine.

In the late 60s and on into the 70's Singer made the Professional buttonholer, which many people swear by.  I have one, but haven't tried it out yet.  It often come with Touch n Sew machines but apparently can be used on early ones like my Slantomatic.

What if I don't have a Singer?
Don't worry, the Greist company made buttonholers for all sorts of different machines.  You do have to hope they are in the right box, because the model is stamped on the end of the box.  Here are the pictures of two of the box bottoms listing the models. 


As you can see they cover most of the vintage machines out there, up until the button hole stitch started being built into the machines.  

Aren't sure what type of shank you have, here's a good guide.  And for more info, I always turn to ISMACS, http://ismacs.net/singer_sewing_machine_company/singer_buttonhole_attachments.html

Do you have a favorite buttonholer?  


Friday, November 13, 2015

Gearing up for Etsy sales

Okay the sewing room is a cluttered mess, and I really have to get serious about getting rid of some stuff!  I have a few machines I need to sell, including a Singer 404 that is all cleaned up and ready to go.  And although I have been listing some things on eBay for awhile, I am polishing up my Etsy shop and working on stocking it with lots of vintage goodies.

First I got my daughter, the talented graphics designer one, to make me a custom look -- I gave her free reign, and she came up with the greatest idea: she made my new shop name look like the name plate on a vintage sewing machine!  Check it out:

https://www.etsy.com/shop/StitchRetro

And here is a sample of her work https://www.etsy.com/shop/JenMiniDesign

Do you have an Etsy shop, or sell on eBay?  Or what do you do when the vintage goodies start crowding your space to actually, well,  Sew?

Friday, October 2, 2015

It's fall already, and so a new group of UFOs.

Wow, it's October already, and cooling off.  With the drought I don't expect to see much fall color this year, but on a drive through the coast range yesterday some of the vine maples had a hint of color.  Many trees leaves have just dried up with the lack of rain.  Here on the coast October is usually a wet month, so my fingers are crossed.

Sewing has been happening a bit, although never as much as I would like.  Every quarter a quilting group I belong to on Revelry has a UFO challenge, you must have at least 5 unfinished quilted projects to join.  The goal is to finish at least 1, but I was jazzed I finished 2!

Here are my summer UFOs. And here are the first two on the list, finished:


I of course started some new projects, so I am adding to the UFO list.  The one I hope to work on and finish quickly is a leftover jelly roll quilt, I'm using the jelly roll race method but the strips are left from another project so I am not sure what size it will turn out.  

And here's what it looks like right now:

That's my Singer 99K, I brought it out to the dining room table to sew since we had company and hiding out in the studio didn't seem sociable.  I hope to get this done soon to put on the living room couch, definitely by Thanksgiving (the fabric is left over from potholders and a runner).  It would be nice to do it sooner.

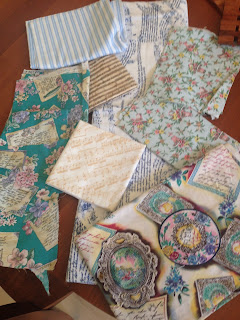
New #2 is a quilt as you go lap quilt that I hope to have done by Xmas, as it is a gift.  Here is a picture of the fabrics, I have already started sewing rows down.  I am using this tutorial: http://quiltingtutorials.com/all/quilt/ .  


#3 is a rescue of a set of vintage blocks I found at a thrift store.  Someone started piecing them together with cheap muslin so I have a lot of unstitching to do, then I think I want to get a vintage repro print for the blocks in between, or a color.  


The rest of the list is in the link from last quarter that was up top.

#4 is the Christmas table runner that is still on the design wall, sigh.  

#5 is the fourth of July quilt, sitting in a corner ready to sandwich, quilt and bind.

#6 is the "quick" potholders that are still sitting around.  

I'm not even counting the guild BOM blocks, I know I am not getting to those any time this year.  

So I got two done last time, I am going to hope for 3 this round!


And because this blog is supposed to be mostly about vintage sewing machines, here is a great blog post talking about cleaning a vintage 99K that is very similar to mine.  Mine dates to 1951, although I have put a new motor and foot petal on it as it came to me with no motor.  I also bought a wooden base, as it was missing that.  And a few accessories....

Anyway it's a great little machine.  I think this blogger has some great advice, except I strongly disagree with her wiping the machine first with a wet rag with what sounds like dish soap.  Soapy water can be horrid for decals, I always use sewing machine oil on a rag for that first wipe down.


Happy stitching!


Friday, September 25, 2015

A few UFO's and a peek at my Davis New Vertical Feed treadle.

I did finish a few things this summer, but of course I am starting more!

At the beginning of July I posted some Unfinished Objects for a group challenge in a quilting forum on Ravelry.  I did finish a couple of things:

Jon's quilt got done about a day before his Birthday, and was happily gifted on time. It was pieced on the Singer 66 I wrote about last time I got a chance to blog.

And I finally finished the insulated shopping bag:


The bag has a quilted lining, and was totally sewn on my Davis New Vertical Feed treadle sewing machine.  

The Davis NVF is a pretty amazing machine, quilters love it for binding, but it is great for anything with many layers - the types of things you usually need a walking foot for.  Why, because the needle moves the fabric, there are no feed dogs.  This technique apparently is used in many industrial machines, but as far as I know the Davis Vertical Feed is the only one for home use that operated like this.  

Here is a video link showing the unique action:

So the layers don't slip as you stitch.  Some other bloggers have written about this machine and done a great job, so instead of re-inventing the wheel go read Jennigma's blog or Dragonpoodle studio.

If you get the lust for this machine as I did after reading about it, here is a great guide to identifying the Davis models.  http://www.kelsew.info/domestic/davisvfmodels.html The thing to know is that the New Vertical Feed, the one with the trefoil design on the bed, is the only one that takes modern 15 x 1 needles.  It also is a shuttle machine, but there are bobbins available for it.   

Lots of links here, but no pictures of my baby, here is the photo from when I got her:

As you can see she was in great shape, I haven't done any of my usual spa routines on her, just some basic oiling and a little citrus oil on the cabinet and I have been busy sewing.  One of these days I will spend some time really cleaning, and take pictures, and play with the attachments and share it all.  But right now the sun is shining in the studio and I have a fall quilt project I want to get started on.


Wednesday, August 12, 2015

The lovely Singer 66-16

I just slammed my way through a couple of projects, and all of them were done on my Singer 66.  No hiccups, it just sews a beautiful stitch each time.  This machine has definitely turned into one of my favorites, and it's kind of funny because I never even planned on using it.

She came home with me in a plastic case from a thrift store, at a bargain price.  I had a 99K I was organizing, and saw the new looking motor and foot pedal on this Singer in a white plastic hardshell case.  I picked up another machine the same day, and didn't even take another look at this one for a few days.

When I opened her up and started looking, I saw how pristine she looked.  I lifted her up and inside the case was a little baggie with receipts and a perfect instruction book.


This machine, serial number AF656090 is made in 1938 or 1940 depending on the reference source.  One of the ones I use is ISMACS.  The owner who left all the goodies with the machine, bought her used for $37 in 1977.  Close to 40 years after she was made.  Then a repair to feed dogs in 1979, replacement of motor and foot controller in 1986, and a cleaning and tune up in 1997.  

When I saw all that, I had to thread her up and try her.  I went to clean out the bobbin case and all the places where dust and lint accumulates, but it was immaculate.  A little oil and she purred, and sewed a beautiful straight stitch.  I didn't even have to adjust the tension.  So I decided I can't take the motor off, and needed to find a cabinet for her.  

It took a while, but I finally found a Singer Queen Anne cabinet, not the early one with the split top, a bit more recent, but it suits the machine.


This blogger http://www.sewalot.com/singer%2066.htm refers to the 66 as being the queen at the time, so I felt the Queen Anne style suited her perfectly.

Here she is looking pretty regal:


I picked up this vintage booklet, mainly for the picture of the machine and cabinet.

My queen didn't come with any attachments, most likely they were with it when it was donated, but that particular thrift store bundles up sewing attachments and doesn't keep them with the machines.  If the manual and receipts hadn't been hidden inside the case I doubt they would have been with the machine either.

So I had to go hunting for the attachments mentioned in the manual, here are all the ones that are shown:

Left from top to bottom:  
Foot hemmer 120855
Adjustable hemmer 35931
multi-slotted binder 160359

on the right from top
edge-stitcher 36865
gatherer 121441
Ruffler

That is the standard set according to the manual that came with it, I have gathered lots of the optional accessories for this machine, but that is a post for another day.  Oh, if you have come across one of these machines, and don't have a manual handy, you can get a free pdf from the singer site.

And if you have found a lovely Singer, but are not sure what it is, I love this ID site.


Wednesday, July 29, 2015

Thinking about the Stash

Like many quilters when I first got started quilting I bought fabric.  Lots of fabric.  Anything that caught my eye, or was on sale, or was just pretty.  It was so exciting starting a new fiber interest, that I went a bit nuts with fabric, and books, and tools.

After all, having a stash is part of being a quilter, right?  Just like a yarn stash was part of the knitting explosion.  Revelry has tons of people "flashing their stash".  I talked to the husband of a quilter, and he said to me knowingly, "I bet you have a huge stash".

Well this may be blasphemy, but for me the stash is not a good thing. I don't actually like scrappy quilts, and if I did make them I would use, well, scraps!  Which I am accumulating pretty rapidly.  I like using coordinated fabric lines for quick quilt projects, I have even done a couple of kits where the fabric was provided.  And when I design a quilt using my own fabric going shopping for the fabric is a whole lot of fun.

And I am finding that too much clutter in my crafting life sucks all the joy out of it.  All that stuff sits there sort of quietly nagging me to do something with it, and makes me feel guilty when I plan a new project and go buy new fabric that fits the design idea.


I am really trying to pare down to things I can finish. I can’t help but have a few UFO’s in the works, especially in different crafts, but am trying to pare down on random things I may never do. This is currently a big deal with me, I am going so far as to clean my studio and do some serious de-stashing. I have just found that the sheer amount of stuff, especially in my craft world, is making me miserable rather than bringing me the joy a hobby (or three) should bring.

The funny thing is that this is the second time I have come to that realization, I went through this with yarn a few years ago, did a ton of purging and pared it down to a small bin.  I have more than enough if I randomly need to start a project and can't shop -- but odds are the next project I knit or crochet I will start with a trip to a store or a wander online.

And with the quilts, I have a list of UFOs much longer than I posted a few weeks ago.  Most of them aren't started enough to qualify for a UFO challenge, but I have been through the weeding process twice now and those have stayed.  Some of them I have more than enough fabric for, so there will be more de-stashing once I pick the ones that make it into the project.  But it feels so much better to have a manageable amount of fabric in the wings, with a small cupboard of stuff I just really liked in case I want to make a small item without shopping.

And I found a link to some great projects to help with stash
http://tipnut.com/scrap-happy-fabric-scrap-ideas-free-patterns/

Feel free to share your thoughts on stash building, does it work for you or just benefit fabric and/or yarn companies?

Saturday, July 18, 2015

Super cool quilt basting technique

I am trying to finish a birthday quilt in the next couple of weeks, today I am pin basting it so I can get it quilted.  I just had to look up again my favorite basting method, so I thought I would share it with you.

Board Basting

This is just genius, I have used it for two or three quilts already, much better than crawling around on the floor, and spraying nasty spray basting, which I did before I read about this.

Here is the top I finished (pieced on my lovely Singer 66 from the 40s).  I'll have to introduce you to that machine soon.

And here it is being pinned:


I hope this helps someone, I sure love this technique.  I bought some pre-finished mdf boards at a hardware store, they are 6 feet long and work great.  


Tuesday, July 7, 2015

A pause to post some UFOs.

I am pausing the sewing machine parade to list some UFOs (UnFinished Objects) for my participation in a challenge on a quilting forum on Ravelry.  We have to have at least 5 unfinished projects to participate, and although I have more than that I decided instead of listing them all I would just list the ones I hope to actually work on the next 3 months.  We will see how that goes.


#1 is really my top priority, as it is a birthday present due in early August.  I know, you are thinking "GET BUSY".  I need to get back on it tonight.


#2 is a quilted grocery/picnic cooler bag.  I have all the pieces cut:

I did a bit of test quilting, since it is so thick, with two layers of Insulbrite batting.  I am planning on using my new Davis New Vertical Feed, so I was wondering how it would do, well I shouldn't have worried.


It went through the thickness like butter, with no slipping or sliding of layers, and no catching of the batting on the feed dogs (since there aren't any!).  I love this machine!

The bag is based on the tutorial from SewMamaSew http://www.sewmamasew.com/2011/06/summer-sewing-insulated-picnic-tote/

#3 Is my Fourth of July quilt, pieced on my White Family Rotary treadle, I just need to sandwich and quilt it, and bind it.  


#4 is a simple Christmas table runner.  Yes folks, this has been hanging on the design wall since, oh, November.  

Those are Christmas trees.  Now that I have shared this, I really need to finish it.

# 5 is my guilt trip.  I won these blocks from the Block of the Month drawing at my guild meeting. Everyone worked so hard on them, so I feel guilty they are languishing in my studio.  There are a lot here, maybe even enough for two charity quilts.  

# 6 is one of those "easy little projects" that should have been done long ago, a set of potholders from squares I got at a yard sale.  

I think of these often when I use the ones in the kitchen that have gotten so ratty.  I think it's only been a year, but maybe more.  

The challenge only requires finishing ONE quilt or quilted project, so I am very hopeful to meet that and do a bit more.  I really want to finish these before starting on anything new, and even then it should be from the projects I planned and purchased for, that are lurking in little plastic bins.    


Wednesday, June 24, 2015

A truly modern machine, in 1952 - the Elna Supermatic!


I didn't really go in search for a Supermatic, someone in a forum I read was selling one for a good price, and I had been reading about it so I decided to go for it.  She didn't know if it was working, it turned by hand but like many machines the power cord had been lost, so I got a bargain.

We met up on the streets of Portland where the seller was working.  I had to get it home and order a cord before I got to play, but I was very impressed with this machine.


It didn't come with all of the accessories, I had fun collecting them.  But with just an oiling this machine ran great.  It isn't as quiet as the Grasshopper, but mine didn't seem to have the growl that Supermatics can develop after sitting.  There in an interior friction wheel, called a pulley, that can develop a flat spot and make the machine run noisily.  There is a youtube video that has the sound if you are wondering if you have this issue.

In some ways, this machine does pretty much anything you might need for sewing, it really can be  competition for a modern machine.  It has a free arm, and a series of stitches can be made by changing cams, called "discs".  Here is a bit of info showing available stitch patterns. And this came on the market in 1952!  I know someone who does production sewing for farmers markets using a Supermatic, in addition to the stitches you can use low shank attachments.  Bobbins and needles are readily available.  It just needs regular oiling, unlike a modern plastic machine that needs no maintenance, and also is pretty much disposable.

The first machines were all green, like the one I had, then they changed to two-tone green, then beige.  An Elna was expensive, this was a high end machine when first sold.  Needlebar has a great bit of information http://needlebar.org/main/elna/.  And this ISMACS article has some great info too:
http://ismacs.net/elna/remember_the_elna.html . And this chart helps with dating your Supermatic.


For Elna parts, including the pulley and info on replacing it, I recommend White Sewing Center.  There is also a vintage Elna group on Yahoo that is full of information.

And of course often these vintage machines have lost their manuals, here is a link to a scanned version.

I know this post has lots of links, and not a lot of personal info.  There is a lot out there about Supermatics, I don't feel like I have much to add.  And you may notice that I have been using past tense, I found a new home for my Supermatic, after cleaning it up and playing with it a bit.  No particular reason, I just wasn't using it and there is always another sewing machine to add to the collection.  In fact I had already bought a couple more by then, and space was growing tight.

If you have seen my profile elsewhere, I live on the Oregon Coast, with my office on Highway 101.  The buyer lived down the coast from me, and sent her husband to pick up the supermatic.  So I had the privilege of seeing it leave strapped to the back of a motorcycle, to find it's way to a new home.  Wish I had gotten a picture of that!

Oh, and a final thought - sometimes you see folks describe the green Supermatic as a Grasshopper, nope that is the Elna #1, shown in last week's post.  Yes they are both green, and both have the folding knee lever - but they aren't the same thing.  I think part of the reason it happens, at least on eBay, is the fact that eBay suggests title improvements that will help your item sell -- and it keeps trying to add #1 to my listings for vintage Elna items.  I guess they are more collectible, but it doesn't always apply!  


Thursday, June 18, 2015

Truly portable Elna #1 - the Grasshopper.

I kept reading and looking at smaller, hopefully more lightweight machines.  I soon fell in love with the Elna Grasshopper, and hunted one down.

It's cute, it's green, it's light!  Made out of aluminum it isn't much heavier than the famous Singer featherweight.  It's truly a different machine, designed in the 30s, the first one was produced in 1940 in Switzerland. Pretty much everything about it is different, from the color to the case that converts into a table, to the placement of the hand wheel.  But it also takes low shank feet and easy to find bobbins.  Here is a bit of history according to ISMACS  http://ismacs.net/elna/history_of_the_elna_sewing_machine_company.html  and a little more here

Nicknamed the Grasshopper for the folding knee control lever, it is truly portable with an accessory case that sits behind the free arm and fits inside the sheet metal case.  The case is truly ugly, mine is really thrashed.  It used to have a leather handle, but all that is left is a rusted metal strap.  The color looks like an ammo case.


But it folds out into a neat table.  


My case is especially beat up on the outside, with a rusty handle.  I am really considering spray-painting it a fun color on the outside.  Have to figure out what goes with the green.


My grasshopper came to me without any extras, so of course I had to accessorize.  First thing was to get a power cord.  Not hard to find, the plug looks like this

So not hard to find, but the one I got doesn't fit that well so it is kind of annoying but it does work.  I should have ordered from White Sewing Center http://whitesewingcenter.com/elnaparts.php this is the authoritative source for vintage Elna parts.  I later ordered a light bulb and a replacement belt from him, and they are nice quality.

The big thing I was missing was a manual, I would love a paper copy, but was able to find a free pdf version online.  You can find one in the Yahoo Elna Group files (after you join) or here is another version.

One of the things you will read about in the manual is oiling, and using kerosene in the bobbin race.  Originally it came with two cans, one for oil and one for kerosene.  So far I have only oiled it, and it is super quiet.  One of these days I will get a bit of kerosene and try it as someone mentioned it made it even smoother.  

It does seem to to need oil each time I use it, but I don't get it out that often.  But when oiled, it is so quiet.  One of my favorite things to do with this machine is to bring it out into the family room and do quilt piecing.  It sews a beautiful stitch on two layers, I did have a bit of trouble with a thicker project involving several layers and batting, but I think if I had changed feet and adjusted the tension it would have been fine.  I don't think this is the machine to stitch jeans on, but I haven't tried it.

Speaking of different feet, I have collected most of the standard accessories

The manual lists standard attachments:  Presser foot (on the machine), mobile foot (not in picture, its gunky and soaking in tri-flow).  Darning foot and darning plate, and 4 mm Hemming Foot.  I also got an attachment box with the screwdrivers, some bobbins, needles and the green oil can.  The black thing is a speed reducer, I haven't tried it yet but it slows the machine speed for darning and other special techniques.  This blog https://elnagrasshopper.wordpress.com/tag/elna-1-speed-reducer/ tells all about it. 

My Grasshopper serial number is 8210209, and it was made in 1948.  Pretty nifty little machine.  I loved the look of it before I got one, but I bonded with it when I first sewed, it is so quiet and makes such a pretty stitch.

Next week I will talk about the Grasshopper's big sister, the Supermatic.  


Wednesday, June 10, 2015

Designed to compete with Featherweight? Not really...White 77MG.

As I continued to read up on 3/4 sized portable machines, I ran into this info in a book about Featherweights. Since I already loved my White Family Rotary, I was excited to read about a magnesium version of a White machine that was made to be portable.  I was soon on the hunt for a White 77MG.

I scored one pretty easily at an auction site, they aren't super rare.

It's a straight stitch machine, in a dark green crinkle finish.  I love the deco styling of the badge and dials..


It takes regular 15 x 1 needles, the bobbins aren't at your fabric store, but are easy to get online as they fit many machines.  Here is a link http://shop.sew-classic.com/Bobbins-White-Kenmore-Rotary-5-pack-744.htm and sometimes you can find them on eBay.

Some people don't like White Rotary machines because the threading is a bit different.  It isn't hard to get used to, but it is a very different tension mechanism.  SewUsa has a great diagram that makes it really clear.  http://www.sewusa.com/Threading_Diagrams/Threading_Pages/White_Sewing_Machine_Threading/White_77_Threading_Diagram.htm

Another complaint is that it is a friction driven machine.  Rather than a belt driving it, there is a rubber wheel which rests against the hand wheel and powers the machine.  
Sometimes after it sits against the wheel awhile, it develops a flat spot. This can be prevented by keeping it away from the wheel while not in use, a pencil or chopstick works great for this.

If it does develop a flat spot, since it it an external part it isn't hard to fix, or replace.  I have read about shaving it down until smooth, but since I can find a rubber pulley online at somewhere like Sew Classic for under $5 I would probably take that route.  

My 77MG came with a tin of rotary attachments, 

But even if you aren't so lucky, these are easy to find on eBay and other sites.  There are different size of openings on the top clamping rotary attachments, this machine uses the ones with the 3/16" wide opening on the top. 


So not a replacement for a featherweight.  It does come in a similar case, but in the case the whole thing weighs about 30 lbs.  But a sturdy straight stitcher, with some cool retro looks.  I haven't made a project on this one yet, wonder what it wants to make?